3 Widget Popular Post dengan Satu Gambar – Berbicara widget populer post ini memang tidak ada habisnya, para pendesain blog menyulap widget populer post menjadi lebih unik dan menarik. Salah satu Widget Entry Popular Post yang unik dan menarik perhatian yakni Widget Popular Post dengan Satu Gambar.
Widget ini menampilkan satu gambar atau thumbnail besar artikel populer kamu disertai dengan judul postingan, tampilan popular post ini sangat menarik, kemungkinan yang terjadi artikel tersebut bisa menjadi pusat perhatian para pengunjung setia Blog kamu untuk membuka halaman artikel tersebut.

Untuk kamu yang tertarik ingin memasang widget Popular Post ini, kamu bisa mengikuti panduannya di bawah ini step by step. Langsung saja ke topik inti yakni tutorial pemasangan ke-2 Widget Popular Post dengan Satu Gambar ini.
1. Login ke akun Blogger menggunakan email dan kata sandi kamu
2. Setelah berhasil masuk kedashbord blog, kamu pilih Layout/Tata letak
3. Kemudian klik tambah gadget
4. Langkah selanjutnya, kamu pilih Entry Popular

5. Klik tombol simpan
Setelah widget berhasil di buat, langkah berikunya adalah menambahkan kode ke dalam template kamu.
1. Masih keadaan login di akun Blogger
2. Silahkan kamu pilih Tempalte, lalu klik Edit HTML
3. Kemudian kamu cari kode </body>, copy script di bawah ini dan pastekan diatasnya.
<script type=’text/javascript’>
//<![CDATA[
function resizeThumbarlina(e,t){for(var s=document.getElementById(e),r=s.getElementsByTagName(“img”),c=0;c<r.length;c++)r[c].src=r[c].src.replace(//s72-c/,”/s”+t),r[c].width=t,r[c].height=t}resizeThumbarlina(“PopularPosts1”,400);
//]]>
</script>
4. Tahap berikutnya, kamu cari kode ]]></b:skin>, lalu kamu salin kode di bawah ini dan pastekan diatasnya.
/* Popular Post One Image1 */
#PopularPosts1 ul{padding:10px 0;margin-top:-15px;}
.PopularPosts .item-thumbnail{margin:0}
.PopularPosts .widget-content ul{padding:0;margin-top:-7px}
.PopularPosts .item-title a{text-decoration:none;font-weight:400;font-size:14px;color:#000;line-height:1.4em;transition:all ease-in-out .1s;}
.PopularPosts .item-title{padding-bottom:.4em}
.PopularPosts .widget-content ul li:hover a,.PopularPosts .widget-content ul li a:hover{color:#48d;}
.PopularPosts li:first-child .item-snippet{position:absolute;top:0;opacity:0;visibility:hidden;width:85%;left:11px;color:#fff;background-color:rgba(172,22,172,.83);padding:10px;font-size:90%;line-height:normal;transition:.3s}
.PopularPosts li:hover:first-child .item-snippet{top:20%;opacity:1;visibility:visible}
.PopularPosts img{width:100%;height:100%}
.PopularPosts .widget-content ul li{list-style:none;margin:10px 0 0!important;padding:0 0 10px!important;line-height:1.3em!important;position:relative;border-bottom:1px solid #f1f1f1}
.PopularPosts li .item-snippet{display:none}
.PopularPosts li .item-thumbnail{width:85px;height:72px;margin:0 10px 0 0;overflow:hidden;float:left}
.PopularPosts li:first-child .item-thumbnail{width:100%;height:100%;max-height:190px;overflow:hidden;margin-bottom:10px}
.PopularPosts li:first-child .item-content{position:relative}
.PopularPosts li:first-child .item-thumbnail,.PopularPosts li:first-child .item-snippet{display:block}
.PopularPosts li:first-child .item-title a{font-size:18px;line-height:1.2em;font-weight:700; background-color: rgba(32, 32, 32, 0.77);width: 173px;height: 50px;padding: 10px 24px;color:#fff}
5. Simpan Template
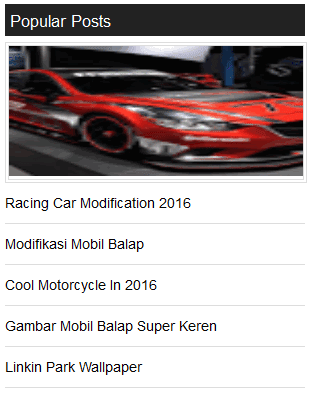
Hasil dari kode diatas

Widget Popular Post dengan Satu Gambar 2
1. Login ke akun Blogger
2. Silahkan kamu pilih Tempalte, lalu klik Edit HTML
3. Kemudian kamu cari kode </body>, copy script di bawah ini dan pastekan diatasnya.
<script type=’text/javascript’>
//<![CDATA[
var newidth=295;var neweight=170;$(“.popular-posts .item-thumbnail img”).each(function(){var t=$(this).attr(“width”);$(this).attr(“width”,newidth),$(this).attr(“height”,neweight),$(this).attr(“src”,$(this).attr(“src”).replace(“/s72-c/”,”/w”+newidth+”-h”+neweight+”-c/”))}),$(“.PopularPosts .item-snippet”).text(function(t,i){return i.substr(0,70)});
//]]>
</script>
4. langkah berikutnya, kamu cari kode ]]></b:skin>, lalu kamu salin kode di bawah ini dan pastekan diatasnya.
/* Popular Post One Image2 */
.PopularPosts .widget-content ul{padding:0;margin-top:-10px;width:100%}
.PopularPosts .item-thumbnail{margin:0;border:4px double #ddd;}
.PopularPosts .item-title {padding:0;}
.PopularPosts .item-title a{text-decoration:none;color:#000;font-weight:400;font-size:14px;}
.PopularPosts .item-title a:hover{color:#FCA13A}
.PopularPosts .item-snippet{font-size:14px;line-height:1.6em;color:#777;padding-top:10px}
.PopularPosts li{border-bottom:1px solid #ddd}
.PopularPosts li .item-thumbnail,.PopularPosts li .item-snippet{display:none}
.PopularPosts li:first-child .item-thumbnail,.PopularPosts li:first-child .item-snippet{display:block;overflow:hidden;max-height:170px;margin-bottom:10px;font:13px Arial;width:100%;}
.PopularPosts img{padding:0;height: 130px;width: 100%;}
.PopularPosts .widget-content ul li{padding:10px 0;margin:0;list-style-type: none;}
5. Simpan Template
Hasil dari kode diatas
Widget Popular Post dengan Satu Gambar 3
1. Login ke akun Blogger
2. Silahkan kamu pilih Tempalte, lalu klik Edit HTML
3. Kemudian kamu cari kode </body>, copy script di bawah ini dan pastekan diatasnya.
<script type=’text/javascript’>
//<![CDATA[
function resizeThumbarlina(e,t){for(var s=document.getElementById(e),r=s.getElementsByTagName(“img”),c=0;c<r.length;c++)r[c].src=r[c].src.replace(//s72-c/,”/s”+t),r[c].width=t,r[c].height=t}resizeThumbarlina(“PopularPosts1”,400);
//]]>
</script>
4. Berikutnya, kamu cari kode ]]></b:skin>, lalu kamu salin kode di bawah ini dan pastekan diatasnya.
/* Popular Post One Image3 */
#PopularPosts1 ul{padding:10px 0;margin-top:-15px;}
.PopularPosts .item-thumbnail{margin:0}
.PopularPosts .widget-content ul{padding:0;margin-top:-7px}
.PopularPosts .item-title a{text-decoration:none;font-weight:400;font-size:14px;color:#000;line-height:1.4em;transition:all ease-in-out .1s;}
.PopularPosts .item-title{padding-bottom:.4em}
.PopularPosts .widget-content ul li:hover a,.PopularPosts .widget-content ul li a:hover{color:#48d;}
.PopularPosts li:first-child .item-snippet{position:absolute;top:0;opacity:0;visibility:hidden;width:85%;left:11px;color:#fff;background-color:rgba(172,22,172,.83);padding:10px;font-size:90%;line-height:normal;transition:.3s}
.PopularPosts li:hover:first-child .item-snippet{top:20%;opacity:1;visibility:visible}
.PopularPosts img{width:100%;height:100%}
.PopularPosts .widget-content ul li{list-style:none;margin:10px 0 0!important;padding:0 0 10px!important;line-height:1.3em!important;position:relative;border-bottom:1px solid #f1f1f1}
.PopularPosts li .item-snippet{display:none}
.PopularPosts li .item-thumbnail{width:85px;height:72px;margin:0 10px 0 0;overflow:hidden;float:left}
.PopularPosts li:first-child .item-thumbnail{width:100%;height:100%;max-height:190px;overflow:hidden;margin-bottom:10px}
.PopularPosts li:first-child .item-content{position:relative}
.PopularPosts li:first-child .item-thumbnail,.PopularPosts li:first-child .item-snippet{display:block}
.PopularPosts li:first-child .item-title a{font-size:18px;line-height:1.3em;font-weight:700}
Hasil dari kode diatas

Silahkan kamu pilih salah satu populer post yang kamu sukai, untuk dipasangkan di blog atau web kamu. Untuk mendapatkan kodenya silahkan download pada link dibawah ini:
Widget Populer Post – Download
Demikian tutorial cara membuat widget popular post dengan satu gambar, sekian dari saya Happy Blogging.